
How to efficiently butcher a whole chicken.
I normally prefer to buy whole chickens because you can see the condition of the whole chicken. You know if it's been crushed, bruised, or missing limbs due to a freak tango-line accident. For whatever reason, the Food and Drug Administration (FDA) here in America will allow parts of a chicken to be sold from a whole chicken that has parts which did not pass inspection, as long as the offending parts are removed. Butcher houses that come across chickens with damaged or potentially diseased parts are allowed to simply cut off that part of the chicken and throw it away, then cut up the rest of the chicken to be sold as pieces. However, with whole chickens, the whole chicken must pass inspection. I don't want a chicken breast or thigh from a chicken that had an extra wing growing out of it's butt at the hatchery, or two heads, even if it's not those parts I'm eating. I'll stick to whole chickens, thanks.
For this reason, I've become efficient at butchering my own chickens. I don't like to waste meat, and use every part of the chicken. I use the bones for my own chicken stock, and I don't like to leave any usable meat on the bones when I do, so I am going to show you how to get the most out of your chicken, and keep the flavorful meat where it should be, on our plates.

First we start off with a whole chicken. I certainly recommend buying whole chickens that are organic, locally raised, and fresh. Organic chickens cost a little more than the standard mass-raised chickens we find at supermarkets, but this is one area where you can really taste the difference. Organic chickens have a nice rich flavor that can't be reproduced by any other means. This chicken came tied for baking with the wing tips already cut off, but your chicken should look similar.
It's very important to rinse your chicken thoroughly inside and out no matter how fresh it is. We want to keep the chances of contamination as low as possible, so wash, wash, wash, everything before and after we complete breaking down the chicken.
 Start by pulling the leg away from the body. The skin will stretch and you will find a natural place to cut. Cut away the skin and open up the area between the leg and the body.
 As you get close to the back, when you fist begin to cut meat away from the bone, be sure that you cut away the meat that is connected to the back of the chicken. You will see this little bump on the back where the leg meets the body. This is called the oyster meat, and it's very prized and very tasty. Let's take it off the bones and keep it as part of the thigh portion.
When you get down to the leg bone, you don't need to cut through it. Flip the chicken over and bend the chicken leg open towards the back. This will cause the join to dislocate, so you can now slide the knife between the bones through the joint without having to cut through anything tough.

Follow the bones down through the butt and cut the leg cleanly off.
Repeat for the second leg.

Next, we want to separate the wings from the body. Place the bird with the breast side down, so the back and the wings are on top. Again, there is another bump of oyster meat that we want to cut off the back bones and keep it as part of the wing portion. Holding on to the wing for stability, start with the knife laying flat on the back, behind the oyster meat and begin to press down, under the oyster and through the wing joint.

Once through the joint, cut straight through, taking a very little part of the connected breast meat to increase the size of this wing portion. If you cut too much of the breast off, the meat will be a little dry due to the mixture of cooking dark and light meat at the same temperature, and your breast portion size will suffer.
Cut the tips off the wings since there is no usable meat there, and they tend to burn before the meat is actually cooked. Save the tips for chicken stock.
After both legs and wings are separated from the chicken body, we are left with the breast meat on the bones. When I was growing up, I was accustomed to chicken portions that included the rib meat. I thought about this and I can't think of any good reason to leave the breast meat on the bone. I think some people find it easier to butcher the breast meat, cutting straight through the bones to separate the breast from the back. Not only is this not nice on my knife blade, but it also shields the breast meat from flavor and I have found a method of removing the breast meat from the bone that is just as fast and easy.

Look at the top end of the chicken, where the neck cavity is. If you feel inside, you will feel the small V-shaped bone beneath a thin layer of meat. This is the wishbone. We want to take our knife and cut under the wishbone to separate it from the meat.
 Once you cut both sides of the bone, you will be able to slide your fingers underneath the bone, and dislocate it from the body.


Now take your finger or thumb and slide it between the meat and the ribs, gently pulling the meat away from the bone. You can separate the meat all the way until you see the outer skin which is still attached.
 Look at the outside of the breast and you will see a natural line of white fat where the end of the meat connects to the bone. Use your knife and cut along this line, completely separating the meat from the body.
The meat will come off cleanly and you will be holding a boneless chicken breast in your hand. You can now remove the skin or leave it on depending on your preferences and how you will be cooking the breast meat.
Remove the second breast and you will have a very clean chicken body that you can now save along with the wing tips to make your chicken stock with. Use it within 2 days or freeze for later usage. However, we are not finished with the breasts.

Flip the chicken breast over with the skin side down. You will find a tube-shaped piece of meat on top that you can simply pull off the the breast. This is the chicken tender. It's similar to a beef fillet. It's very tender and flavorful. If we leave it as part of the chicken breast, it will only make the breast meat thicker, needing longer cooking time which jeopardizes the moistness of the breast. By separating the chicken tenders, we can control the cooking time of the breast easier, and it also allows more of the breast meat to be exposed to the flavors we will be cooking with.

Separate the tenders from the breasts and savor them as a cook's snack since they will cook much faster than the rest of the chicken, or begin cooking them closer to the finish time of your chicken meal. In any case, I prefer not getting a breast where the tender has fallen off anyway, leaving a naked spot of flavor on the breast.
OK, we are almost done. Your chicken is now broken down into 6 pieces (plus 2 tenders). You are welcome to leave it this way but I prefer to take it one step more. Separating the thigh from the leg. By separating them, I can control the cooking temperature of each piece rather than leaving them attached, so inevitably the leg meat will be over-cooked and dry by the time the thigh meat is juicy and ready to eat.
I have seen may people struggle with finding the leg joint. One method is to lay the leg down and just aim for the joint between the pieces and cut. Rarely, the guess is right cutting straight through the joint. What usually happens is we aim slightly wrong and have to grind through the bone and joint cartilage. Cutting through bones is not nice to the knife, so I'd prefer to always be sure when cutting through that joint.

Another way I've seen, which is a bit smarter, is to close the joint using your hand and make a small incision on the outer end of the joint. Then you can lay the leg on the board and use that cut to align your separating cut. It's still not 100% accurate. I don't like it.
So here's the really simple, always accurate way of separating the leg from the thigh. Holding the end of the leg, bring the leg up so that the end you are holding is straight up in the air. This puts the joint strait underneath you. The thigh will naturally display where the joint is.
 Place the knife into the joint like you would hold something in your own elbow joint. Now if you push the leg end over the knife slightly, closing the leg, the knife will be trapped exactly in the joint.
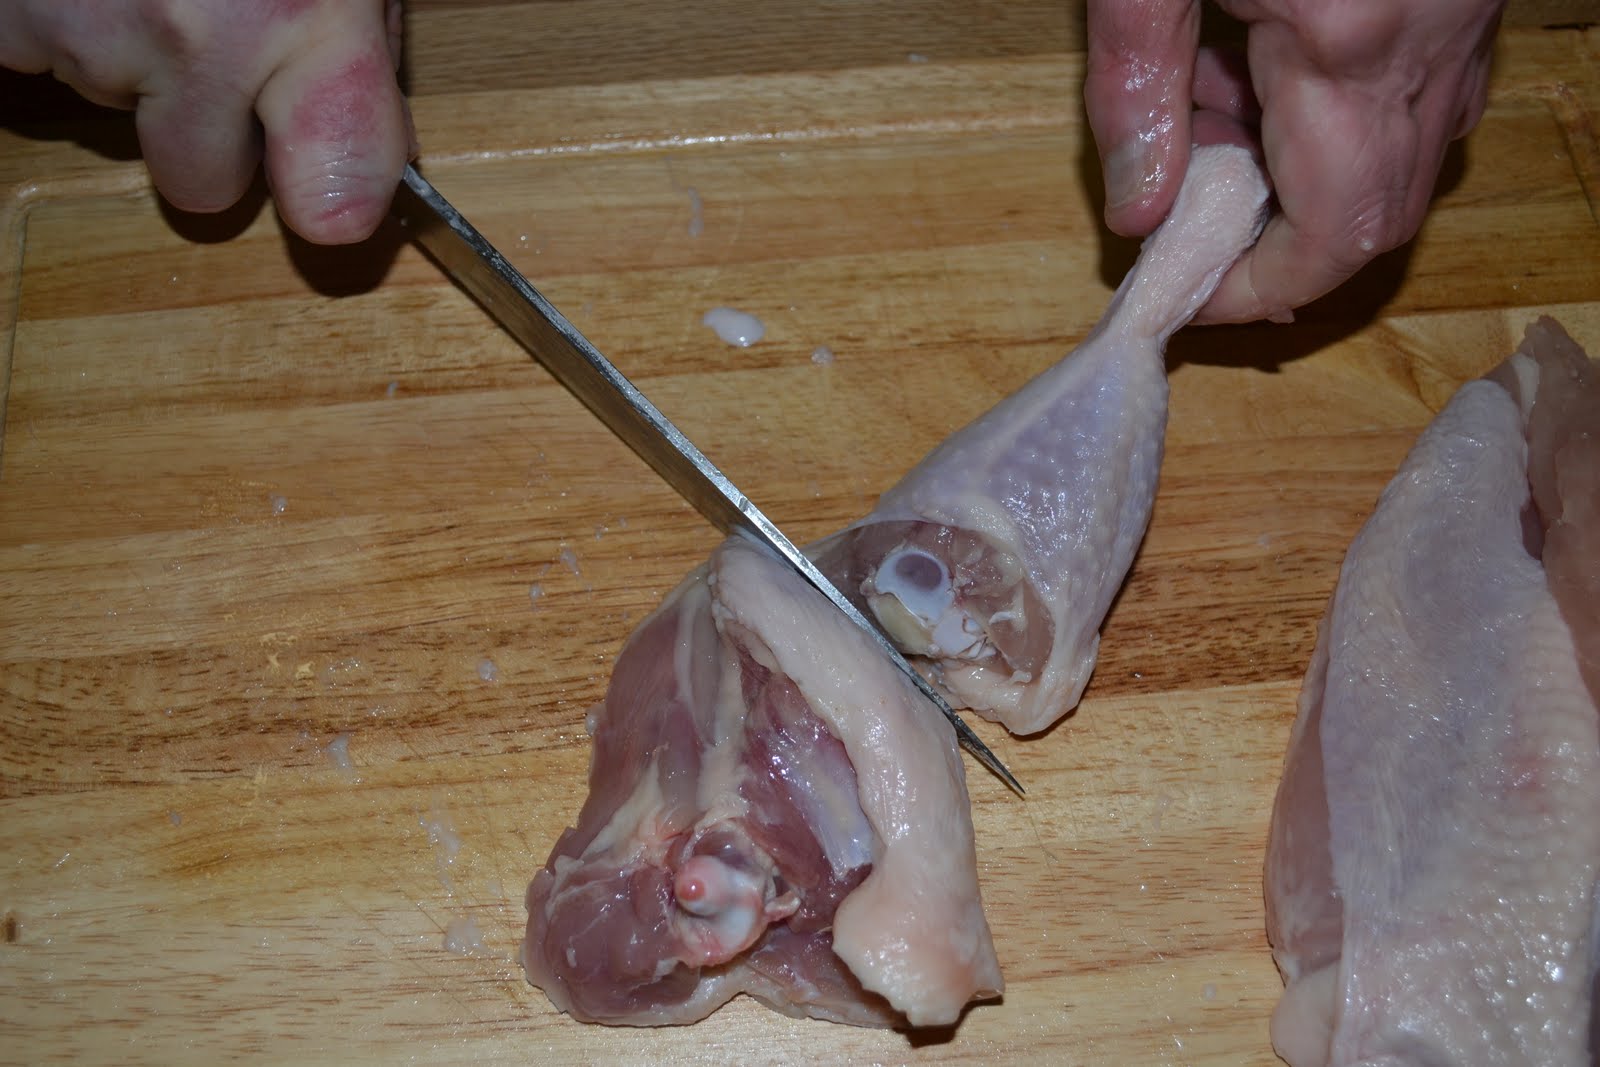
Now we have an 8 piece chicken, with boneless chicken breasts. It's simple, quick, and easy, and a lot cheaper than buying chicken pieces already butchered, not to mention you don't have to worry about eating pieces of chickens that may have had other pieces which didn't pass inspection.

Don't forget to save your bones, clean every surface that came into contact with chicken, and now find a great recipe to bring out the best American Flavors.
No comments:
Post a Comment