Showing posts with label slaw. Show all posts

Wednesday, March 16, 2011

Filet with Apple Slaw & Stuffed Potato

Filet with Wine Glazed Mushrooms and Apple Pear Slaw

The most notable difference I encounter between America and Russia when I am cooking is the availability of meats. Actually I should say that meat is available no problem, but that there are major differences between American meat and the meat I cook with in Russia. The American public is rapidly becoming aware of the appalling conditions in which meat is raised and slaughtered. I'm not going to go into details about the system, however the result is that we get relatively inexpensive meat, marbleized with fat which produces more flavor.

By contrast, most of the meat available to me in Russia does not have this fat marble and so the meat must be cooked differently. Another big difference that is difficult to get used to is the way meat is cut and portioned. In most traditional markets, they don't have band saws and cutting equipment that is commonplace in American slaughterhouses and butchers. So as I walk the aisles of the marketplace, middle-aged women sling large cleavers with blood splattered across the front of their smock. They chop through a chunk of meat while calling out to me trying to get my attention towards their wares. It always causes a cold shiver to crawl up the back of my neck and I can't help but wonder if they have a hockey mask under the table somewhere. At least I know the meat is fresh.

Since meat is generally hacked up in whichever fashion they choose, premium cuts are often lost, unrecognized, and tossed into the pile for making farsh (ground beef). Occasionally I find steaks that could be called T-bone, but almost never a good filet. The filet is the most luxurious piece of meat on a cow. I remember the first time I cooked a porterhouse steak in Russia for my girlfriend. After taking a bite she couldn't understand the difference; why had I made such a big deal out of finding these 2 steaks? I told her she should now take a bite from the other side of the bone. Watching her eat bite after bite of the filet side, all I heard were unique noises of approval and a simple "wow". There is a difference!

So a good filet is definitely another one of those indulgences I don't pass up when I spend some time in California. Tonight, I made classic filets with a simple twist. Seared filet topped with a white wine, mushroom reduction and topped with some apple pear slaw.

We should prepare the slaw first so when the filets finish cooking we can simply top them and get to eating!

Apple Pear Slaw

1 medium carrot
1 fuji apple
1/2 anjou pear
juice from 1/2 lime.
 Peel the carrot, apple and pear and cut them into 1/8 inch (3 mm) matchsticks.

Place them in a bowl and cover them with the juice of 1/2 lime. The lime juice will keep the slaw from turning brown while we cook the steaks. Toss to coat everything with the lime juice.


You see the two filets here have a beautiful fat marble running through them which is a good sign of flavor. Start off by washing them under running water and drying them completely. Season the filets with salt and pepper on both sides. Preheat the oven to 350F (177C).

Add 2 Tbsp (30 ml) of olive oil to a pan. Don't use a non-stick pan because we actually want the nice brown bits to stick to the pan while we sear the filets for 2 minutes on each side.

After searing the filets on both sides. Place them onto a lightly greased pan (or use aluminum foil) and place them into the preheated oven for 10-12 minutes (depending on the thickness) or until the internal temperature of the meat reaches 135F (57C). 

You will notice in this picture, I have stuffed potatoes to go with the filets. The stuffed potato recipe is below.


While the filets are finishing in the oven, return to the pan we seared them in. You will notice lots of tasty little brown bits on the bottom of the pan. This is all great flavor!!

Add 1 cup of dry white wine to the pan and stir over medium heat, scraping all the tasty brown bits off the pan with a wooden spoon. Keep scraping and cooking for 2 minutes, allowing the liquid to reduce and being sure to scrape the pan clean.
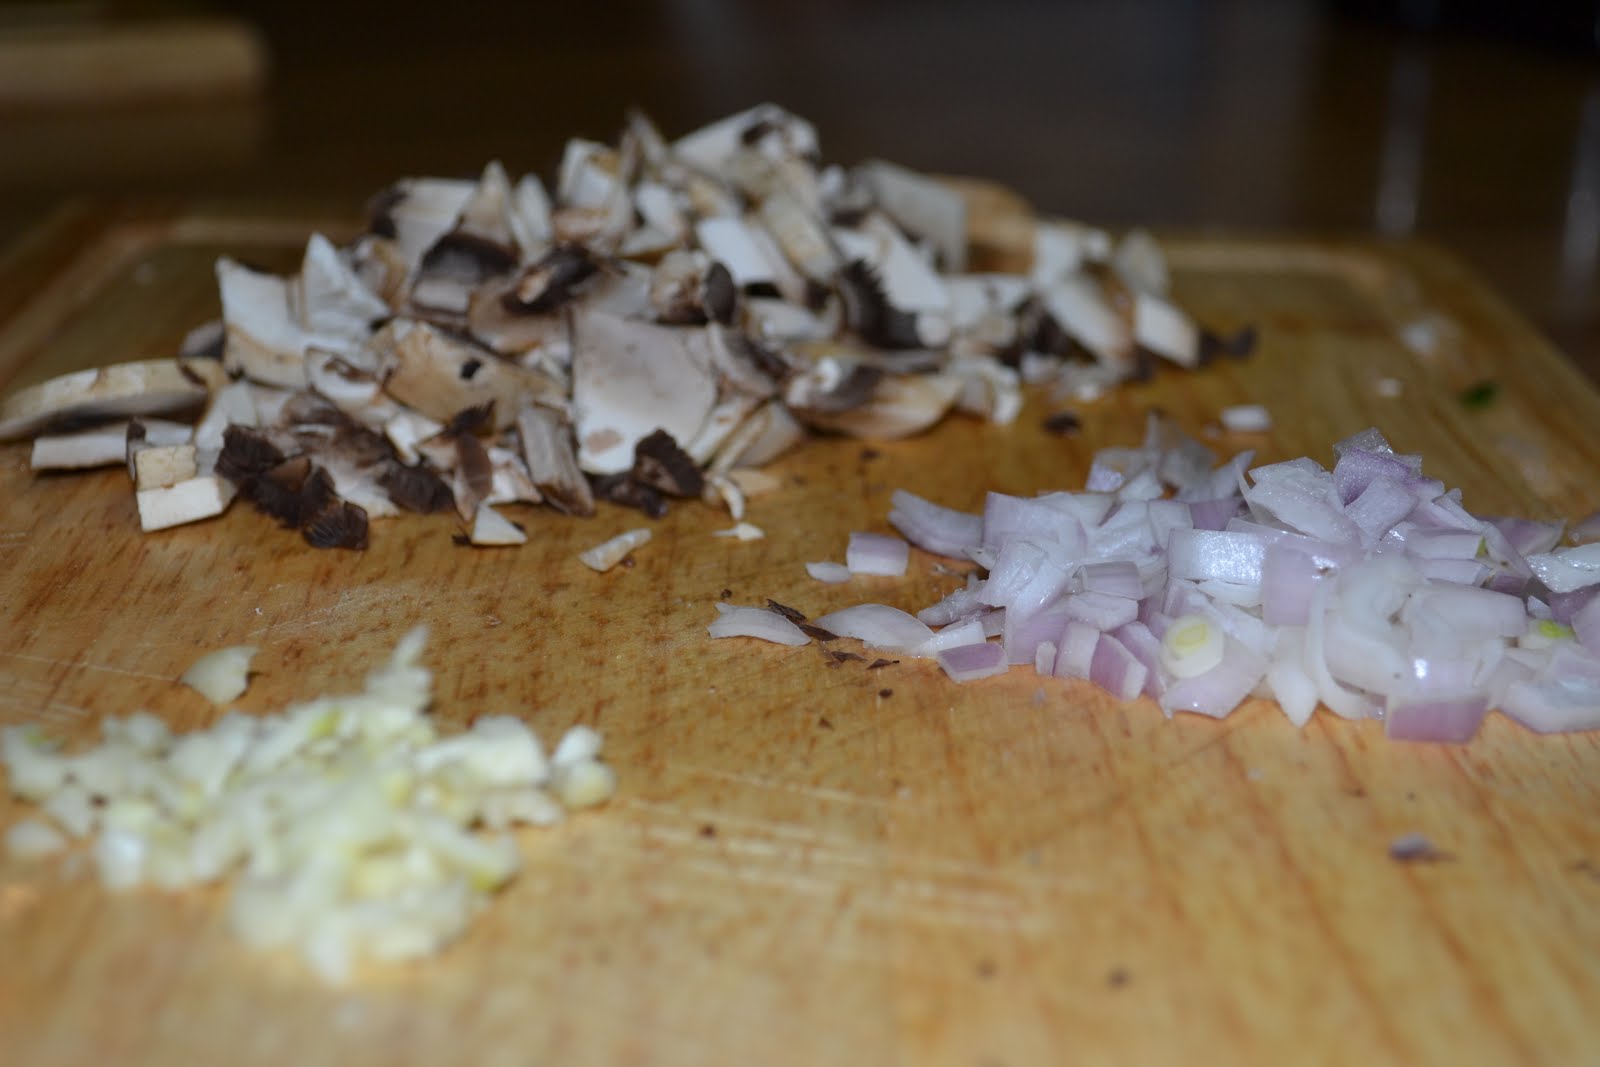
Mince 1 clove of garlic, 1 small shallot (or 1/2 small red onion), and 2 mushrooms.

Add the mushrooms, onion, and garlic to the pan with 1 Tbsp (15 ml) butter. Stir gently until combined. Cook for 5 minutes until the liquid is reduced slightly.

When the filets have reached their perfect internal temperature of 135F (177C), remove them from the oven and place them on a plate. Top the filet with the mushroom mixture.

I have had this debate with my friends in Russia several times. Russians generally (and I hate to generalize) will overcook their meat until it is dry and without any color in the middle. Since there are not many controls for meat quality and preparation, there is a scare of disease. Russians compensate by cooking meats so much that nothing could survive (including the meat). We need to remember that juiciness is determined by temperature. Everybody loves a juicy steak right?

Most bacteria, including salmonella that might be in the meat, die at 140F (60C). By cooking our meat to 135F(57C), the carry-over cooking time will raise the internal temperature to 140C (60C) before it starts to cool again. this will give us dead bacteria (if it was ever there to begin with) and juicy meat!! Sounds like a win-win situation to me. Let the meat rest for 5 minutes before cutting so the juices will settle back into the meat and not just run out when the meat is cut. This rest time also allows the carry-over cooking to do it's job.


Top the steak with the apple slaw and serve.

Stuffed Potatoes

3 medium baking potatoes (russets are perfect)
1 cup (225 ml) cheddar cheese, grated.
2 green onions, chopped
1 Tbsp (15 ml) butter
1/4 cup (59 ml) milk
salt and pepper

Clean the potatoes thoroughly under cold water. Do not peel the potatoes. Poke each potato 3 or 4 times on each side with a fork. This helps the moisture escape while they bake, instead of tearing a hole in the skin to let the moisture out. Bake the potatoes for 50-60 minutes, or until the feel soft when squeezed. 

Cut the potatoes in half lengthwise. 

Using a clean kitchen towel to protect your hand from the hot potatoes, use a large spoon to hollow out the skin. 

Continue to spoon out each potato half and put the scouped potato into a bowl with the grated cheddar cheese. Save the empty skins.

After all the potato halves are hollowed, add 1 Tbsp (15 ml) butter and 1/4 cup (59 ml) milk to the bowl.

Use a potato masher or a fork to mash the potato and cheese mixture with the milk and butter.


Once the potato and cheese is combined, add the chopped green onions and use a spoon to combine. We don't want to add the green onions before this time because the onions would also become mashed while mashing the potatoes.
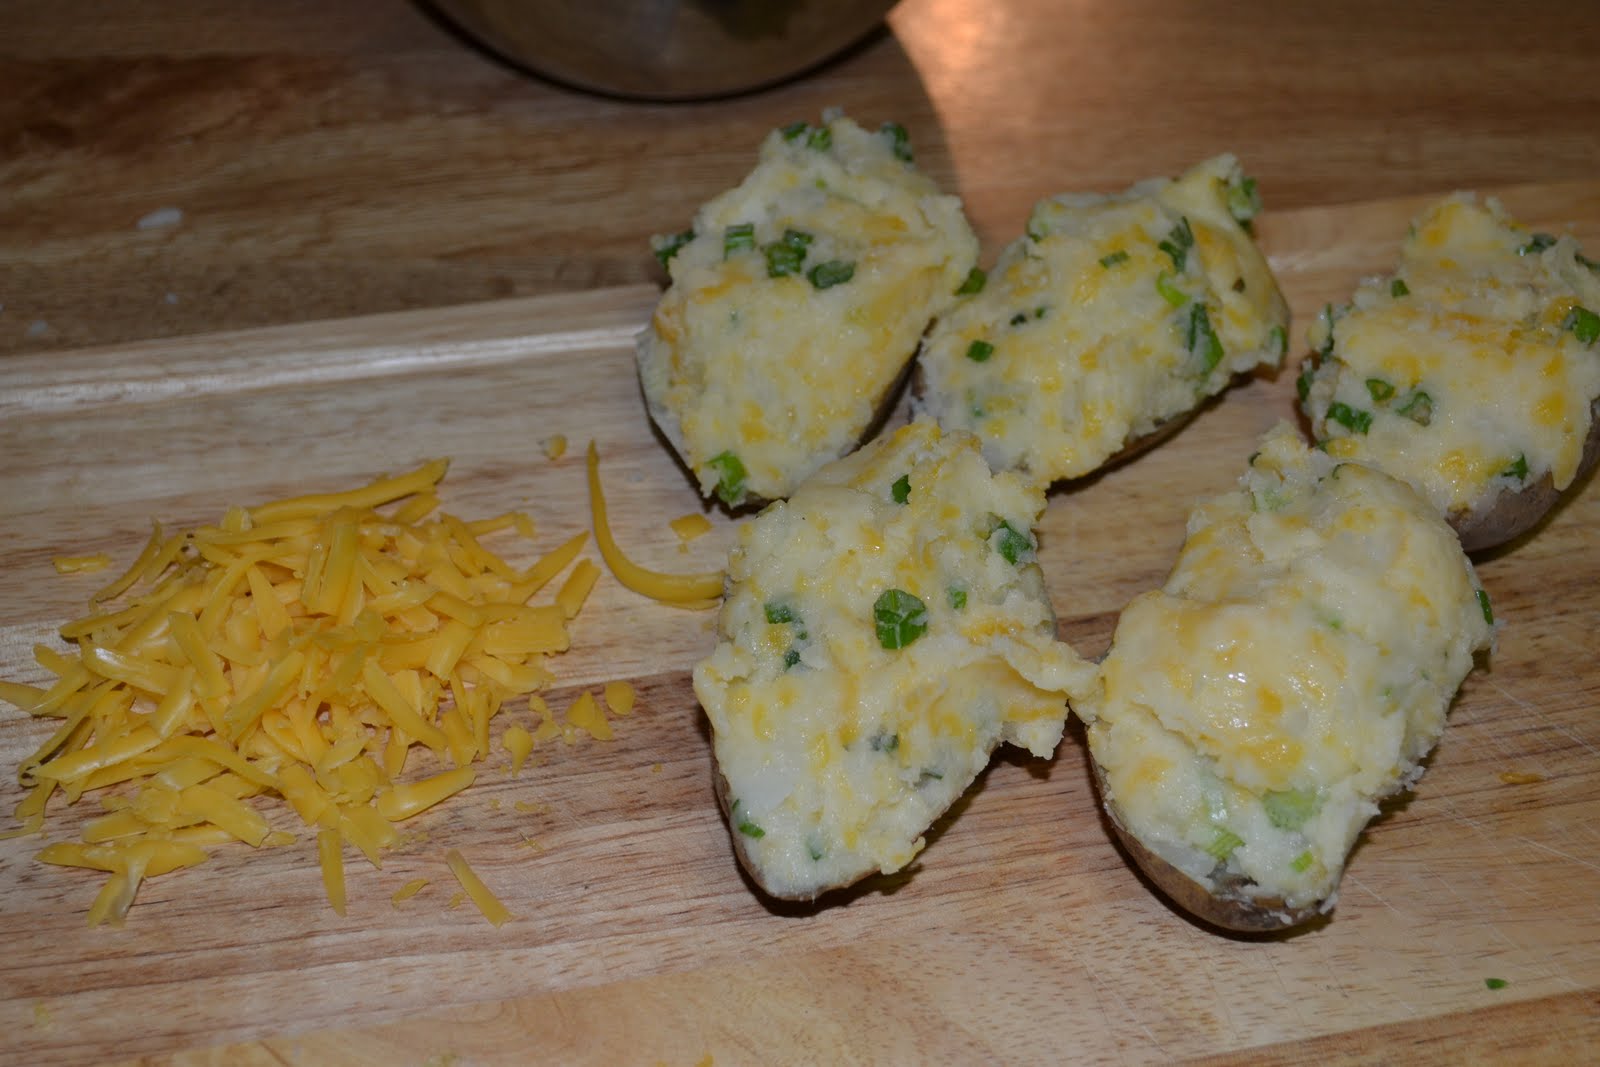

Take each empty skin and use the large spoon to fill them with the mashed potato mixture. I usually overload the skins a little so I will end up with 1 or 2 extra unused skins. This helps in case you accidentally tear a skin too much while refilling them.


After filling the potato skins with the mixture, top them with some of the grated cheddar cheese and place them on a lined pan. Place into the oven on the highest rack and broil for 10 minutes or until the cheese melts and begins to brown.


You can enjoy these stuffed potatoes with many different meals, or even alone by themselves. Top them with bacon, sour cream, or many different condiment ideas you might have. Experiment and see what you like.

There was not much talking while we were eating these filets and stuffed potatoes. It's always a good sign when there's silence, it means people are too busy eating!!


Unfortunately, before you know it, you'll be down to your last bite!! So remember, find a good piece of meat, and we like marbleized fat when looking for a tender piece of meat. Don't overcook the meat!! Cooking meat until there is no color inside means there is also no juiciness and flavor inside, so lets cook it only enough to kill the possible dangerous bacteria, but not so much that we loose our flavors.

The filet is one of my favorite pieces of beef, and when I find it in Russia, it's a big treat. It's usually pretty cheap too because it's sold as just another piece of meat. In any case, finding some great ingredients to go with it, and using just enough heat to get the job done, is one of my favorite American Flavors.

Sunday, March 6, 2011

Pan Fried Chicken with Cole Slaw

Pan Fried Chicken with Cole Slaw

The deep south in America is famous for many things, and personally I think the food ranks at the top of the list. The south is famous for it's unique food which has influences from many cultures, most notably French, African American, and British. Southerners created such flavors as seasoned, boiled crawfish by the pound, deep pit barbecue, and of course - Southern Fried Chicken.

I remember walking through the busy streets of Moscow looking for something familiar to eat during one of my trips to Russia, when I turned the corner and saw a big restaurant sign with a cartoon chicken head in the middle and the words "Rostik's KFC". Wait, what? KFC? Really? But who is Rostik and what did he do to the Colonel? Veeeeery interestink, comrade. I went in and sure enough, it was a fried chicken restaurant.

Rostik's definitely hatched from the Kentucky Fried Chicken empire, however there were some very disturbing differences. Growing up, I rarely got a chance to eat KFC since there wasn't one in my home town. However, when I did find a KFC and had a chance to eat there, I always ordered the same thing.  So when I saw this KFC in Moscow, my mouth started to water and my stomach screamed "YES!" after weeks of eating tasty, although unfamiliar, and sometimes unidentifiable food.

I walked in and ordered 2 pieces of fried chicken, mashed potatoes with gravy, and cole slaw. I was excited about the flavors I was about to enjoy but... what? You don't have mashed potatoes and gravy? Is it a joke? The best thing about KFC is the mashed potatoes with gravy and the cole slaw side-dishes!! OK, fine. Just give me the chicken and cole slaw then, it'll be ok. NO? It's not OK? How can you not have cole slaw? This is KFC right? It's like McDonald's down the street not having french fries!!

The person taking my order looked at me like I was the crazy one. Me... crazy! So, I paid for the chicken and had to ask; Why no cole slaw and mashed potatoes? It was explained to me as if anybody who knows how to tie their shoes should also know, Russians won't pay for them. Who would buy mashed potatoes and cabbage when they are the easiest and most common food they can make at home!? Well, since you put it like that... it did kind of make sense. I sheepishly smiled and nodded then involuntarily answered, "uhh, Amerikanskii".

I never forgot that experience in Moscow. I still kind of chuckle about it, and think about the Russian/American differences even in fast-food patronage. I decided that it was just one of those observations I could never explain to my friends in Russia. 

When I returned to Russia after my time in California, I discovered that they had built a Rostik's KFC in the small city where I lived! I thought, yeah, cool... but no mashed potatoes or cole slaw I bet. Exactly right, but even more obscure than that... the first 4 times I went in there, they didn't even have any chicken! I was told that I would have to wait 25 minutes if I wanted fried chicken. They had chicken sandwiches and french fries I could order, but they never had any fried chicken. It turns out, they cook it to order so they don't have to worry about throwing any unsold chicken away. I simply shook my head at the picture of the Colonel on the wall, and left.

So, that was a little bit of my experience with fried chicken in Russia, and in my small city. They have it, but they don't. It makes sense to me that if mashed potatoes and cole slaw are so easy to make at home, then we just need a good fried chicken recipe.


Any time we are handling chicken, we want to keep everything clean. So be sure to wash all surfaces the chicken comes in contact with, and of course the chicken itself. Today I am cooking 4 chicken thighs because that is what I have, but this same exact recipe can be used for a whole chicken that is butchered into 8 pieces, or whatever you happen to have. When I only have chicken breasts, I usually cut them into equally-sized strips and cook them the same way and eat them as chicken tenders.

The ingredient list:

Chicken pieces
Garlic Salt (or table salt will work)
Hungarian Hot Paprika
1 large egg (you may need 2 depending on the amount of chicken you are cooking)
1 splash (1 teaspoon or 5 ml) milk
1 cup (240 ml) all-purpose flour
2-3 cups vegetable oil for frying

After washing the chicken, dry it completely with paper towels or napkins. It's important the skin is dry so there is no excess water making it difficult for the coatings to stick to the chicken, not to mention that water and hot oil does not mix and can be dangerous. Dry it good and we will avoid oil splatters later.

Lay the chicken pieces next to each other and sprinkle paprika to coat them liberally. Both sides. Next sprinkle garlic salt on the pieces and press the spices into the skin gently with your hand.
In a small bowl, add 1 splash (approximately 1 teaspoon or 5 ml) to 1 large egg. Use a whisk and beat the egg vigorously until completely combined and small bubbles begin to form in the mixture (about 30 seconds).

Incorporating air into the egg will help keep the outside of the chicken light as it cooks.

In another bowl, add approximately 1 cup (240 ml) of all purpose flour. Some people prefer to add their spices to this flour, but I think it's very wasteful. By putting the spices directly on the chicken, the flavor is sure to be in every bite, and not lost in the trash can with the excess flour.


In a heavy, thick pan, heat approximately 2-3 cups of vegetable oil. The amount of oil with depend on the size of your pan. We want about 1/2 inch (1.5 cm) of oil in the pan. We are not going to completely cover the chicken, we only want the oil to come up halfway on the pieces of chicken. Don't forget, as you add chicken, the oil level will rise.

Theres a big reason why we don't want the chicken to be completely covered by oil. Again, water is our enemy. Even though we dried the chicken after washing it, there is a lot of natural moisture in the chicken meat. The oil we will be cooking with should be heated to approximately 350F (177C) temperature. So if we drop our coated chicken into the hot oil, it will quickly seal all that moisture inside. Sounds like a good thing, right? Not in this case.

As the chicken cooks, and the moisture tries to escape, it will be sealed in by the outer coating that already reacted to the hot oil. This causes the moisture to build up between the coating and the chicken meat, creating fluid that separates the coating from the meat. Have you ever taken the first bite of a piece of fried chicken and all the skin comes off in that first bite? That's why. This moisture trapped inside does not mean it will keep the chicken meat moist and juicy. It will simply run out the first time the coating is opened. So to avoid this trapped, useless moisture, we will cook in only enough oil to cover the chicken half way. This way, the moisture can escape out the top of the chicken as the bottom half cooks, then we simply turn the chicken over half way through cooking. The skin will stay on the chicken meat as we bite into it and we will get that great flavor in every bite.

Heat the oil until it just barely starts to smoke. Don't let it burn, but we need the oil as hot as possible. The hotter the oil is, the less oil will penetrate into the chicken, adding calories and greasiness. If you have a thermometer, our target temperature is 350F (177C). If you don't have a thermometer, you can use the handle of a wooden spoon to check if bubbles form when you put it in the oil. Don't add the chicken to the oil too early or the finished chicken will be very oily, even if you bring it to high temperature during cooking.

Place the chicken, the bowl of egg wash, and the flour near each other so you can easily go from one to the next.
When the oil is hot enough, dip the seasoned chicken one piece at a time into the egg, flipping it to completely coat, then dredge it in the flour, coating it completely.

Shake off the excess flour or it will just become burnt mud in the oil, and place the chicken gently into the oil. Thicker flour coating does not create thicker or more tasty skin crust.

Always place the chicken into the pan by laying the chicken away from you. Drop one side of the chicken into the oil and then lay it down away from you so if there is any oil splash, it will not splash towards you, causing painful burns.
Cook the chicken until you can see the edges beginning to brown, about 5 minutes depending on the oil temperature and quantity of chicken in the pan. I like my chicken dark brown because it creates a deeper flavor, but if you like your chicken golden brown, just flip it earlier.

We don't intend to cook the chicken completely in the oil. We are only concerned with the crispiness of the outside of the chicken. If you are cooking an 8-piece chicken, place the thighs in the middle since they take the longest to cook, the legs near the thighs to get high heat too, then the breasts and wings on the outside since they will cook faster. It is possible that by the time the skin on an 8-piece chicken is finished cooking, the inside will be finished too.


Since my chicken thighs are alone in the pan, the oil stays hot, and cooks the outside quickly, so if I wait until the inside is cooked (to approximately 170F / 77C) then the skin will be burned. That's not good flavor. So to finish cooking the inside, remove the chicken from the oil, drain on a cooling rack, and then finish the chicken in a preheated (350F / 177C) oven for 10-15 minutes. The inside will finish cooking and the outside will not be burned. Just remember, temperature decides juiciness, not trapping moisture inside, so aim for the right temperature.


It is important to remove the chicken from the oil to a wire cooling rack. Do not drain them on paper towels or newspaper. The towels will absorb the oil, but the towel is still in contact with the chicken, so the oil will simply equalize itself, and soak evenly into the towel and back into the chicken skin, making it soggy. So remove the chicken to a wire rack to drain, sprinkle immediately with a little salt, then check the temperature inside the chicken (goal is 170F / 77C) and finish in the oven if necessary.

Of course fried chicken needs cole slaw. I didn't make mashed potatoes with gravy because I felt we already had enough food for dinner and I wasn't really craving the potatoes, but I will post my incredible gravy recipe in another meal soon, I'm sure.

Cole slaw ingredients:

1 small head cabbage
2 medium carrots
1/2 cup (75 ml) mayonnaise
1 Tbsp (14 ml) mustard
1/2 lemon
salt and pepper to taste
Start by cutting the head of cabbage in half, dividing the core. Use angled cuts to cut out the core and discard.
Lay each half of the cabbage flat on the cutting board and slice the cabbage into thin slices. Cut all the shreds once or twice in opposite directions to make them smaller, bite-size pieces.
Wash and peel the carrots, then shred using a grater.

Place the cabbage shreds and the carrots into a large bowl and cover with 1/2 cup (75 ml) mayonnaise. Add 1 Tbsp (14 ml) mustard, the juice from 1/2 lemon, and salt and pepper.


Using your hand, squish the ingredients together and mix thoroughly. Cover with plastic wrap and refrigerate until ready to eat.

Enjoy this fresh cole slaw with the fried chicken, and save any left-overs for later. The flavors will increase the next day.


Here is my simple fried chicken recipe with cole slaw, which apparently is nothing like anything my friends in Russia have cooked before. I guess boiling chicken has been popular way too long. Healthier, but boiled chicken is not my favorite flavor. There's no need to wait 25 minutes for "fast-food" and overpay for southern fried chicken at KFC, just follow this recipe and enjoy one of the south's favorite American Flavors.